
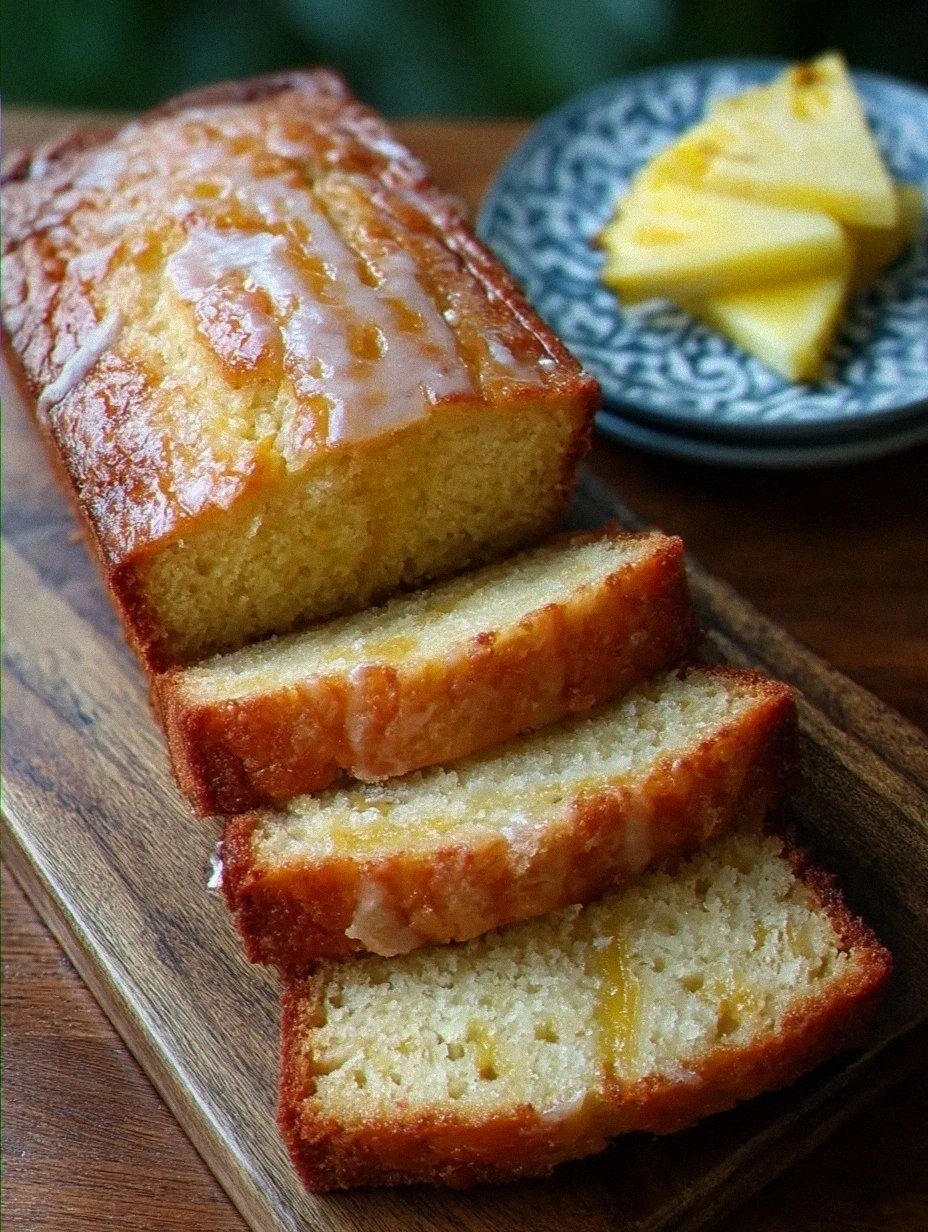
It was a sweltering July afternoon when I first discovered the magic of pineapple bread. The kitchen window was thrown open, letting in a chorus of cicadas, while the scent of fresh‑baked dough began to swirl like a tropical breeze. I remember pulling the loaf from the oven, the crust crackling softly as I lifted the lid, and a cloud of caramel‑sweet steam enveloped the room, instantly transporting me to a sun‑kissed beach. That moment sparked a tradition in my family: every time the pineapples are in season, we bake this bright, buttery loaf and share it over coffee, tea, or even a glass of chilled orange juice. Have you ever wondered why a simple loaf can feel like a vacation in a bite? The answer lies in the balance of sweet fruit, buttery crumb, and a hint of citrus that makes each slice sing.
What makes this recipe stand out isn’t just the pineapple itself, but the way the fruit’s natural acidity lifts the dough, creating a tender crumb that stays moist long after it cools. I’ve tried countless variations—some with coconut, others with rum—but the classic version always wins because it respects the fruit’s bright personality while adding a comforting, home‑y feel. Imagine the golden crust cracking gently as you slice through, revealing a speckled interior dotted with juicy pineapple chunks that melt on your tongue. The aroma is a heady mix of toasted butter, caramelized sugar, and a whisper of vanilla that makes you want to dive right in. But wait until you see the secret trick in step 4 that turns an ordinary loaf into a bakery‑level masterpiece…
If you’ve ever walked past a bakery and been drawn in by the scent of sweet, buttery pastries, you know that feeling of anticipation that builds before the first bite. That’s exactly the feeling I want you to capture in your own kitchen. This pine‑sweet loaf isn’t just a snack; it’s a conversation starter, a comforting breakfast, and a dessert all rolled into one. The best part? It’s surprisingly easy, requiring only pantry staples and a few minutes of your time, yet it delivers a depth of flavor that will have your family asking for seconds (and maybe thirds). Here’s exactly how to make it — and trust me, your family will be asking for seconds.
🌟 Why This Recipe Works
- Flavor Depth: The natural acidity of pineapple reacts with the baking powder, creating tiny air pockets that lift the crumb while also adding a subtle tang that balances the sweetness. This chemistry ensures each bite feels light yet satisfying, like a tropical cloud that melts on your palate.
- Moisture Retention: Pineapple’s high water content infuses the dough, preventing it from drying out during baking. The result is a soft, almost cake‑like interior that stays fresh for days, making it perfect for make‑ahead breakfasts.
- Texture Contrast: The crust develops a golden, crackly exterior thanks to the butter and sugar caramelizing together, while the interior stays tender and speckled with juicy fruit pieces. This contrast keeps every bite interesting and delightful.
- Ease of Preparation: With just a handful of steps and common kitchen tools, you can achieve bakery‑quality results without any special equipment. Even novice bakers can follow along and feel confident.
- Versatility: This bread can be served toasted with butter, sliced for sandwiches, or even turned into French toast. Its sweet‑savory balance makes it adaptable to any meal of the day.
- Nutrition Boost: Pineapple adds vitamin C, manganese, and a dash of dietary fiber, turning an indulgent treat into a slightly healthier option. Pair it with a protein source and you’ve got a balanced breakfast.
- Ingredient Quality: Using fresh, ripe pineapple and high‑quality butter amplifies the flavor, while the simple pantry staples keep the cost low. The recipe celebrates the star ingredient without hiding behind a wall of complex additions.
- Crowd‑Pleasing Factor: The bright yellow speckles and sweet aroma make it visually appealing, while the familiar flavors satisfy both kids and adults. It’s the kind of loaf that disappears quickly at brunches and holiday gatherings.
🥗 Ingredients Breakdown
The Foundation
All great breads start with a solid base of flour, butter, and liquid. Here we use all‑purpose flour for its balanced protein content, which gives the loaf enough structure without becoming tough. The butter, melted and cooled, adds richness and helps create that coveted golden crust. When choosing butter, opt for unsalted varieties so you can control the salt level precisely; the subtle salt enhances the pineapple’s sweetness without overwhelming it. For the liquid, whole milk contributes a creamy mouthfeel, while also reacting with the baking powder to help the loaf rise evenly.
Aromatics & Sweeteners
Sugar does more than just sweeten—it caramelizes during baking, forming a thin, glossy crust that crackles delightfully. I prefer a mix of granulated white sugar and a touch of brown sugar; the latter adds a faint molasses note that deepens the overall flavor. A splash of vanilla extract ties everything together, giving the loaf a warm, comforting backdrop. If you love a hint of spice, a pinch of ground cinnamon or nutmeg can be added here, but remember: we want the pineapple to shine, not be hidden.
The Secret Weapons
The star of the show is, of course, the pineapple. Fresh pineapple chunks give the most vibrant flavor, but if you’re out of season, well‑drained canned pineapple works beautifully. Drain the juice thoroughly—excess moisture can make the batter too wet, resulting in a dense loaf. I like to pat the pineapple pieces with a paper towel to remove any lingering juice, ensuring the crumb stays light. A small amount of lemon zest is another secret weapon; it cuts through the sweetness and adds a bright, citrusy pop that makes the pineapple taste even fresher.
Finishing Touches
Eggs act as a binder, providing structure and helping the loaf rise. Beating them lightly before adding to the batter ensures an even distribution of moisture. Finally, a pinch of sea salt rounds out the flavors, enhancing both the sweet and savory notes. When you combine all these elements, you get a harmonious batter that’s ready to transform into a loaf that looks as good as it tastes.
With your ingredients prepped and ready, let's get cooking. Here's where the fun really begins…
🍳 Step-by-Step Instructions
Preheat your oven to 350°F (175°C) and grease a 9×5‑inch loaf pan with butter, then dust lightly with flour. This ensures the loaf releases easily and the crust forms evenly. While the oven warms, take a moment to inhale the buttery aroma that will soon fill your kitchen—it's the first hint of the deliciousness to come. The pan preparation is crucial; a well‑greased pan prevents a soggy bottom and helps the loaf develop that signature golden crust.
In a large mixing bowl, whisk together 2 ½ cups of all‑purpose flour, 2 tsp baking powder, and ½ tsp salt. The dry ingredients should be evenly combined, with no pockets of powder left behind. This step creates an even distribution of leavening, which is essential for a uniform rise. Once mixed, set the bowl aside while you prepare the wet ingredients.
In a separate saucepan, melt ¼ cup (½ stick) of unsalted butter over low heat. Once melted, remove from heat and let it cool slightly—warm enough to stay liquid but not hot enough to cook the eggs. Stir in ½ cup of granulated sugar and ¼ cup of brown sugar until the mixture glistens. Then whisk in 2 large eggs, one at a time, making sure each is fully incorporated before adding the next. This creates a glossy, emulsified batter that will trap air bubbles for a light texture.
Now for the magic: fold in ½ cup of whole milk, 1 tsp vanilla extract, and the zest of half a lemon. The milk adds moisture, while the vanilla and lemon zest elevate the pineapple’s brightness. At this point, the batter should have a smooth, slightly thick consistency—think of a thick pancake batter. Here’s where the secret trick comes in: add a tablespoon of plain yogurt to the mixture. The yogurt’s acidity works with the baking powder to create extra lift, giving the loaf a tender crumb that stays airy even after cooling.
Gently fold the drained pineapple chunks (about 1 cup) into the batter, distributing them evenly. Be careful not to over‑mix; you want the fruit to stay intact, creating pockets of juicy sweetness throughout the loaf. If you’re using fresh pineapple, make sure it’s cut into bite‑size pieces so each slice gets a perfect burst of flavor. The batter should now look speckled with golden‑yellow fruit, promising a tropical surprise in every bite.
Combine the wet and dry mixtures by gently stirring until just combined. Over‑mixing can develop gluten, leading to a tough crumb—trust me, I learned that the hard way when I first tried this recipe. The batter should be slightly lumpy; that’s a sign you’ve preserved the tender texture. Scrape the batter into the prepared loaf pan, smoothing the top with a spatula to ensure an even rise.
Place the pan in the preheated oven and bake for 30‑35 minutes, or until the top is a deep golden brown and a toothpick inserted into the center comes out clean. Around the 20‑minute mark, you’ll notice the loaf puffing up and the edges pulling away from the pan—those are the signs it’s nearly done. If the top starts to brown too quickly, tent it loosely with foil to prevent over‑browning while the center finishes cooking.
Remove the loaf from the oven and let it rest in the pan for 10 minutes before transferring it to a wire rack. This resting period allows the steam to finish cooking the interior gently, ensuring a moist crumb. As the loaf cools, the aroma will fill your kitchen, inviting you to slice a piece while it’s still warm. Trust me on this one: waiting just a few minutes makes the difference between a gummy slice and a perfect, fluffy bite.
And there you have it! But before you dig in, let me share some tips that will take this from great to absolutely unforgettable…
🔐 Expert Tips for Perfect Results
The Taste Test Trick
Before you bake, give the batter a quick taste. You’ll notice a balance of sweetness and a hint of acidity from the pineapple. If it feels a little flat, add a pinch more sugar or a dash of extra lemon zest. This small adjustment ensures the final loaf sings with flavor, and it’s a habit that can elevate any baked good.
Why Resting Time Matters More Than You Think
Allowing the loaf to rest on a wire rack after baking lets the interior finish steaming gently, preventing a gummy texture. I once sliced a hot loaf straight from the pan and found the crumb was dense; a ten‑minute rest solved that instantly. The steam trapped inside redistributes moisture, giving you a slice that’s both fluffy and moist.
The Seasoning Secret Pros Won’t Tell You
A pinch of flaky sea salt sprinkled on top just before baking creates tiny bursts of flavor that contrast the sweetness. It’s a technique I borrowed from pastry chefs who love the sweet‑salty interplay. The salt crystals melt into the crust, enhancing the pineapple’s natural brightness without overwhelming it.
The Butter‑Brush Finish
For an extra glossy, buttery crust, brush the top of the loaf with melted butter during the last five minutes of baking. This adds a subtle sheen and a richer flavor that makes the crust irresistibly crisp. I discovered this tip when I was trying to mimic the crust of a bakery loaf I loved as a child.
Cooling the Right Way
Never store the loaf while it’s still warm. Place it on a wire rack and let it cool completely before wrapping. Warm bread creates condensation, which can sog the crust and lead to a mushy texture. Patience at this stage pays off with a crisp, golden exterior that stays that way for days.
🌈 Delicious Variations to Try
One of my favorite things about this recipe is how versatile it is. Here are some twists I've tried and loved:
Coconut‑Pineapple Breeze
Swap half of the milk for coconut milk and sprinkle toasted coconut flakes on top before baking. The coconut adds a nutty richness that pairs beautifully with the pineapple’s tang, creating a mini‑tropical vacation in every slice.
Rum‑Soaked Pineapple Delight
Soak the pineapple chunks in a tablespoon of dark rum for 15 minutes before folding them into the batter. The rum deepens the fruit’s flavor, adding a warm, caramel‑like undertone that’s perfect for cooler evenings.
Spiced Autumn Pineapple
Add a teaspoon each of ground cinnamon and ground ginger to the dry ingredients. This spice blend brings a comforting, autumnal feel to the bread while still letting the pineapple shine.
Pineapple‑Cheddar Savory Twist
Fold in ½ cup of shredded sharp cheddar cheese and a pinch of cayenne pepper. The salty cheese and mild heat contrast the sweet pineapple, making it a fantastic snack for brunch or a light lunch.
Glazed Walnut Crunch
Top the loaf with a simple glaze of powdered sugar mixed with a splash of pineapple juice, then sprinkle chopped toasted walnuts over the glaze before baking. The nuts add a satisfying crunch and a buttery depth that complements the fruit.
📦 Storage & Reheating Tips
Refrigerator Storage
Wrap the cooled loaf tightly in plastic wrap or place it in an airtight container. It will stay fresh for up to five days, with the crust remaining pleasantly soft. For an extra crisp crust, store the loaf uncovered for the first 24 hours, then wrap it to preserve moisture.
Freezing Instructions
Slice the loaf before freezing, then arrange the slices on a baking sheet and freeze until solid. Transfer the frozen slices to a zip‑top freezer bag, removing as much air as possible. The bread can be frozen for up to three months; just toast the slices directly from frozen for a quick, warm treat.
Reheating Methods
To reheat, preheat your oven to 300°F (150°C) and warm the whole loaf for 10‑12 minutes, or toast individual slices for 2‑3 minutes. The trick to reheating without drying it out? Lightly brush the surface with a tiny drizzle of melted butter or a splash of pineapple juice before warming. This adds moisture back into the crust and revives the fragrant aroma.


